Open-and-go lessons that inspire kids to love science.
Science curriculum for K—5th grades.
- Hands-on — lead students in the doing of science and engineering.
- Standards-aligned science lessons — Cover core standards in 1-2 hours of science per week.
- Less prep, more learning — prep in minutes not hours. Captivate your students with short videos and discussion questions.
Sign up now to try Mystery Science for free.
Science Units
About this Unit
Print AllIn this unit, students explore how organisms depend on one another and form an interconnected ecosystem. Students investigate food chains, food webs, and the importance of producers, consumers, and decomposers.
Standards
Unit Resources
Assessments
This 3-dimensional summative assessment includes a variety of visual cues and question prompts (multiple-choice, true/false, short answer). It should take 30-40 minutes for a student to complete.
Unit assessmentFor your reference, these are all the assessments included at the end of each Mystery from this unit:
Lesson 1: Food Chains, Producers, & Consumers
Lesson 1 assessmentLesson 2: Matter & Plant Growth
Lesson 2 assessmentLesson 3: Decomposers & Matter Cycle
Lesson 3 assessmentLesson 4: Decomposers, Nutrients, & Matter Cycle
Lesson 4 assessmentLesson 5: Ecosystems & Matter Cycle
Lesson 5 assessmentLesson 6: Protecting Environments
Lesson 6 assessmentLesson 7: Food Webs & Flow of Energy
Lesson 7 assessmentPacing Guides in Google Sheets
Pacing Guides in Excel
Note: We've optimized for Google Sheets as it's free for all users. Excel downloads may have formatting differences.
Lesson 1: Food Chains, Producers, & Consumers
Eat or Be Eaten
Eat or Be Eaten Cards printout
Print on card stock if possible. |
Print 8 copies |
Eat or Be Eaten Score Card worksheet | 30 copies |
Eat or Be Eaten Teacher Tips worksheet | 1 copy |
Rules Of The Game worksheet | 8 copies |
Scissors
|
30 scissors |
We suggest students work in groups of four. Homeschool students will need a partner to play the “Eat or Be Eaten” game as it is designed for 2 to 4 players.
Each group of players will need enough table space to lay out their cards as they form food chains. Clusters of student desks work well for this.
Lesson 2: Matter & Plant Growth
Weighing Air
Weighing Air worksheet | 30 copies |
Weighing Air Answer Key teacher-only resource | 1 copy |
Weighing Air Teacher Instructions worksheet | 1 copy |
Hardcover Books
|
1 book |
Pencil
|
1 pencil |
Rulers
|
1 ruler |
Yardstick or Meterstick
|
1 stick |
Balloons
Minimum of 8 balloons needed for experiment to work. All balloons must be the same size & shape. Mylar balloons will not work because they do not compress the air inside.
|
Details
15 balloons
|
Medium Binder Clips (1 1/4")
|
5 clips |
Paper Clips (Jumbo)
|
2 clips |
Small Binder Clips (3/4")
One binder clip per balloon; minimum of 8.
|
Details
15 clips
|
String
Ribbon will also work.
|
Details
45 feet
|
We suggest students work in pairs for the first part of the activity. Homeschool students can work on their own, but you will need a minimum of eight balloons for this activity to work. The supplies calculated above will provide one balloon per pair of students. If that gives you more than 8 balloons, that’s fine. You and your students can run the experiment multiple times.
Prepare the String for Measuring
This activity will only work if the balloons are fully inflated — which to most people looks like they are about to pop! After inflating a balloon, students will measure the circumference of their balloon to make sure it is fully inflated. In order to do this, students need a piece of string (or ribbon) that’s cut to the length of the balloon’s circumference.
To figure out that length, check your balloon package for the size of your balloons. The size is the diameter of the inflated balloon. Find the circumference by multiplying the diameter by pi (3.14) or by checking the table below. Once you have the circumference, cut that length of string for each pair of students.
Balloon diameter (from package) | Circumference/String length |
---|---|
12 inches | 37 inches |
11 inches | 34 inches |
9 inches | 28 inches |
5 inches | 15 inches |
Any other size | diameter X 3.14 (round down) |
Make a Balance Scale Before Class
This will take about 20 minutes. You need a cleared off desk or table to set up your balance scale. You also need a yardstick, 5 medium binder clips, 2 jumbo paper clips, a wooden ruler, a pencil, and a heavy book. Follow the directions on the Teacher Instructions to make your balance scale.
Make a Balloon Corral (Optional)
Having balloons loose in the classroom can distract students. We use a balloon corral to keep our balloons from roaming. To make one, you need a coat hanger, a heavy book, and a few more jumbo paper clips. Directions on how to make a balloon corral are found on the Teacher Instructions printout.
Organize Supplies for Distribution
In addition to the supplies used to make the Balance Scale and Balloon Corral, each pair of students will need the following materials.
Lesson 3: Decomposers & Matter Cycle
Mold Terrarium
Mold Terrarium worksheet | 30 copies |
Clean-up Supplies (Eg. Paper Towels)
|
1 roll |
Cutting Board
|
1 board |
Knife
|
1 knife |
Additives to Inhibit Mold Growth
Salt, sugar, and hot pepper work well.
|
Details
8 tablespoons
|
Day-Old Loaf of Bread
Ask at a bakery or grocery store for day-old or expired bread.
|
Details
1 loaf
|
Duct Tape
|
1 roll |
Fruit
You will need this number of slices for each type of fruit that you are using. Our lesson shows a slice of apple, orange, and banana in each mold terrarium, but you can choose whatever fruit is easily available. Oranges and strawberries both mold well.
|
Details
8 slices
|
Solo Cups (9 oz)
|
8 cups |
Sticker Labels (1" x 3")
The label needs to be large enough so that students can write their team name, the date, and the starting conditions of their mold terrarium.
|
Details
8 labels
|
Thick Paper Plates
Used as the experiment control.
|
Details
1 plate
|
Thick Paper Plates
The plate must be small enough to fit inside the Ziploc bag. You will throw out the plate and bag when the experiment is done.
Plastic plates will also work.
|
Details
8 plates
|
Ziploc Bags (Gallon)
The bag must be large enough to hold the paper plate and still be sealed.
|
Details
8 bags
|
Ziploc Bags (Gallon)
Used as the experiment control.
|
Details
1 bag
|
You will need access to water for this activity.
In addition to the supplies listed above, you will need a well-ventilated area to store your mold terrariums. The space you have available may limit how many terrariums you make.
Each mold terrarium will be sealed in a Ziploc bag that is then sealed with duct tape. Students will observe mold through the clear plastic, but will not open the bags. When your observation period is over, you will throw the entire experiment away. Do not open the bag. Opening the bag would release mold spores, which can exacerbate asthma and cause respiratory illness.
We suggest students work in groups of four. Homeschool students can work on their own.
Plan Your Time
You may want to divide this activity into two sessions.
Part 1 (students brainstorm ideas for their mold terrarium) takes 10 to 15 minutes.
Part 2 (students set up their mold terrariums) takes 15 to 20 minutes. Part 2 begins at Step 7.
Decide What Variables Students Will Test
In this activity, each group of students decides on ONE condition to change — that is, one way that their terrarium will be different from the basic terrarium, which contains only damp food kept at room temperature. They may choose a condition that they think will encourage mold growth (e.g. heat) or one that they think will inhibit it (e.g. preservatives such as salt, sugar, or hot pepper). So you may want to think ahead regarding what materials or conditions (hot vs cold) you can accommodate in your classroom.
If you divide the lesson as discussed in “Plan Your Time,” you have the option of bringing in additional materials for Part 2 when students set up their terrariums and test different variables.
Students may suggest adding garden soil or compost to the food to encourage mold growth. Don’t do it! Some soil bacteria (known as anaerobic bacteria) make nasty smells when they break down foods. These anaerobic bacteria thrive in a sealed plastic bag with water and fruit. A mold terrarium with soil will grow mold — but it will also stink!
Prepare Food Items Before Class
Before class, cut up the food that you will be using in your experiment. In our lesson, we include a half slice of bread, a piece of cheese, a slice of apple, a slice of orange, and a slice of banana. You can use whatever food items are easily available, but include the same items for each terrarium and try to make them the same size to ensure a fair test. For each team, prepare a paper plate with a piece of each kind of food that you’ll be testing. Here’s an example of what our plates looked like:
Make a Basic Mold Terrarium to Use as a Control
You will need to make a basic terrarium that contains damp food at room temperature. This basic mold terrarium will serve as the control so students can compare their experimental results to it. To see how to set this up for yourself, follow our step-by-step instructions (Steps 7 through 12) here. [Note: If you plan to teach the lesson in two parts, wait to prepare your terrarium right before you teach Part 2.]
Get Duct Tape and Water Ready
Each group will need a cup filled with water so that they can moisten each of their food items, and will also need a strip of duct tape longer than the width of the Ziploc bag so they can double seal the bag. You may want to prepare these supplies prior to class to make distribution easier.
Separate Supplies for Easy Distribution
In Part 1, students will only need their Mold Terrarium printout and a writing utensil.
In Part 2, each group will need the following supplies:
You may want to separate these supplies to make classroom distribution easier.
Observe Mold Terrariums for Two Weeks
The second page of the student handout lets students record observations of their terrarium over time. This lets them see which food molds the fastest in their terrarium. By filling in circles to record how much of a given food is covered with mold, they create a bar graph of the mold growth.
We recommend creating a bulletin board where all teams can record and compare results for their terrarium. By comparing results, students can look for patterns and observe which conditions are most conducive to mold growth. They can then answer questions like:
- Does the same food mold the fastest in all conditions?
- If you had to take food on a long trip and you had no refrigeration, which of these foods would be the best one to take? How would you store it to keep it fresh as long as you could?
Lesson 4: Decomposers, Nutrients, & Matter Cycle
Ask a Worm
Ask a Worm worksheet | 30 copies |
Worm Watcher worksheet | 30 copies |
Clean-up Supplies (Eg. Paper Towels)
|
24 sheets |
Container for Water
Any container that can hold a cup of water will work.
|
Details
4 containers
|
Black Construction Paper
|
4 sheets |
Newspaper
Used as table covers for your worm stations. Plastic trash bags will also work.
|
Details
10 sheets
|
Paper Plates
|
60 plates |
Paper Towels
|
60 sheets |
Plastic Bin
Any plastic container measuring 10” x 14” works well for up to 300 red worms. For more worms, we suggest a larger bin.
|
Details
1 bin
|
Plastic Containers w/ Lids
Each used as a worm station for about a dozen worms.
|
Details
4 containers
|
Plastic Plates (10")
|
4 plates |
Plastic Spoons
|
16 spoons |
Solo Cups (9 oz)
A paper cup or mug will also work.
|
Details
8 cups
|
Worm Bedding
Shredded newspaper or cardboard work well.
|
Details
50 sheets of paper
|
Red Worms
Often sold in quantities of 100-200 at garden stores. See prep instructions below for recommended sources for worms.
|
Details
60 worms
|
We suggest students work in groups of four. Students will share supplies with their group in Part 1 and share experiment ideas with their group in Part 2. Homeschool students can work on their own.
You will need access to water for this activity.
Plan Your Time
You may want to divide this activity into two sessions.
Part 1 (observing a worm) takes 15 to 20 minutes.
Part 2 (experimenting with worms) takes another 20 to 25 minutes. Part 2 begins here.
Source Your Worms
Red worms (also known as red wigglers) can be purchased from a garden store or ordered by mail from a variety of online sources. We recommend ordering from Uncle Jim's Worm Farm. At bait shops, you can sometimes find red worms, but more commonly you’ll find earthworms. The bigger red worms are great for observations and in the natural habitat, they burrow deep in the soil, making red worms a better choice if you want to make a worm bin. Red worms live in the top layers of the soil, feeding on decomposing leaves and organic debris.
Prepare the Construction Paper
Cut each sheet of black construction paper into eight pieces.
Divide Supplies Into Part 1 and Part 2
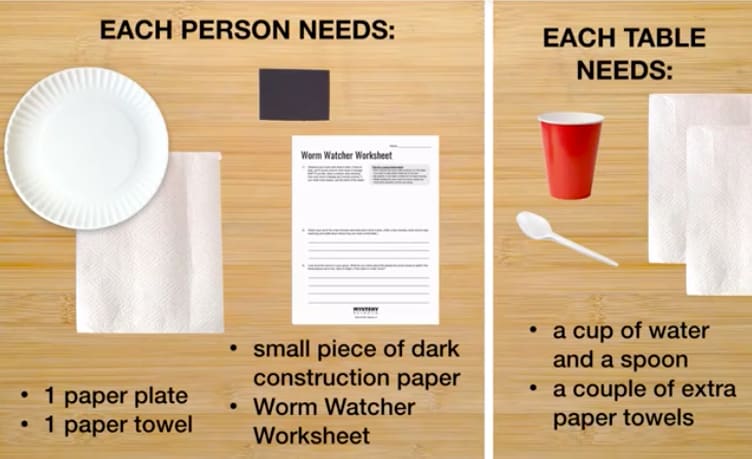
For Part 1, each student needs 1 paper towel, 1 paper plate, a small piece of black construction paper, and a Worm Watcher worksheet. Each table group of four students will also need a cup of water, a spoon, and a few extra paper towels.
For students that don't feel comfortable touching worms, you can provide plastic gloves.
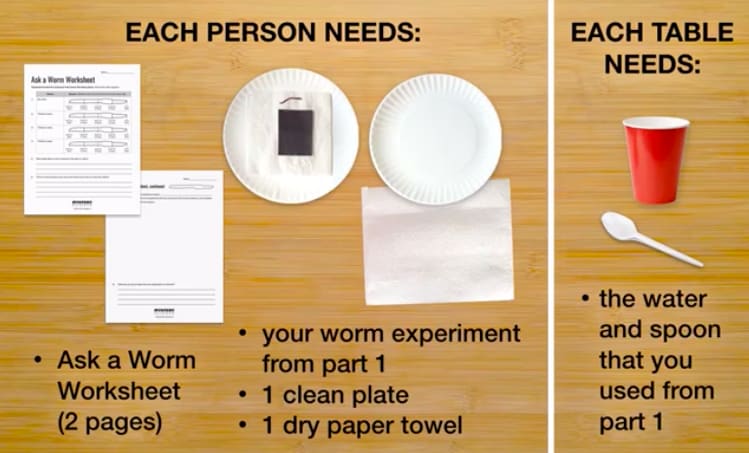
For Part 2, students will need all supplies from Part 1. In addition, each student needs another dry paper towel, another clean paper plate, and the Ask A Worm worksheet.
Set Up a Temporary Worm Bin
Once you purchase your worms, you’ll need to make a temporary worm bin. To make a temporary worm bin, you’ll need a large plastic bin, worm bedding, and some water. First, add a layer of worm bedding that’s at least 2 inches deep into the large plastic bin. Then, wet the worm bedding until it’s thoroughly damp but not soggy. Finally, add your worms.
This worm bin can serve both as temporary housing for your worms and as a place that students can conduct worm experiments, using the approach we describe in the final video of the lesson.
Your temporary worm bin can house your worms for a few weeks. Feed the worms by burying fruit and vegetable scraps (the smaller the better) in their bedding. Worms will eat apple cores, carrot peels, and browning lettuce, but avoid adding lots of orange peels -- they’re too acidic. Worms eat about 3 times their weight in food each week. Keep the bedding moist. Some recommend punching holes in the top of the bin, but our worms have done fine without that. Fluff up the bedding every week or so to make sure the worms get enough air.
Set Up Worm Stations
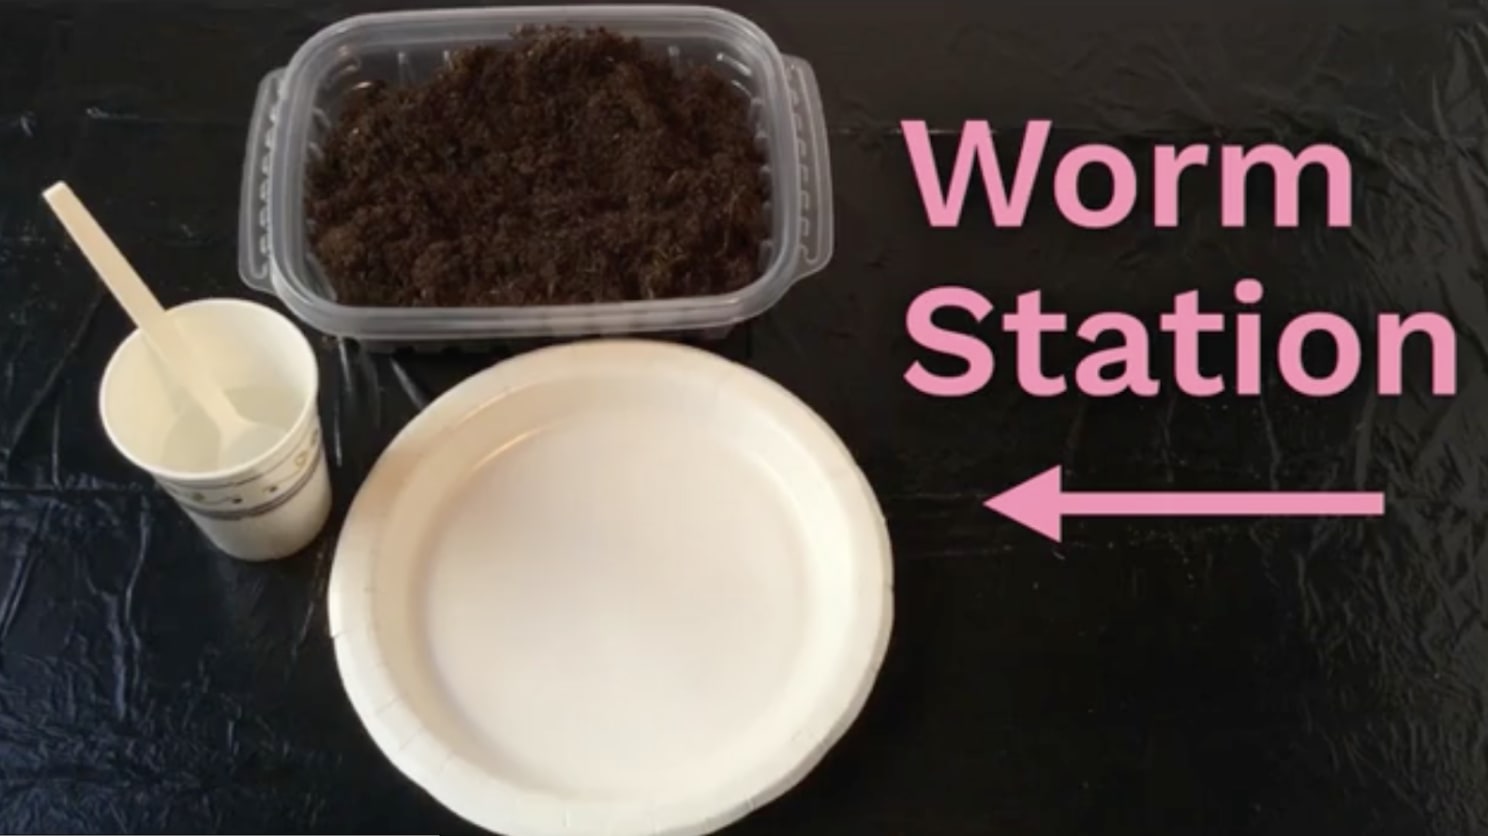
During the activity, each student will observe a worm. We recommend that you set up Worm Stations where students can obtain a worm, wash off the soil, and then bring it back to their desks for observation. For a class of 32, we recommend setting up four Worm Stations. For each Worm Station, dig a dozen worms out of your worm bin. The easiest technique is to wear a rubber glove and dig with your hand. The worms will congregate wherever you last placed food. Check out this video to see how easy it is to set up a Worm Station.
To set up a Worm Station:
- Cover a table with plastic or newspaper.
- Fill a cup with water and place it on the table.
- Put two spoons, one plastic plate, and one of the small plastic containers on the table.
- Right before you do the activity, add some of the worms and soil from your temporary worm bin.
Make a Permanent Worm Bin or Release Your Worms
Our focus is on designing an experiment. Though we don’t include time for students to carry out their experiments as part of this class session, we encourage teachers and students to complete their experiments on their own, using a temporary worm bin. If you want to let students carry out the experiments they design, additional supplies will depend on the experiments they come up with.
NOTE: Worms can be a great addition to your garden, but they are not a good addition to a forest habitat. In a forest, worms devour the leaf litter that native plants and animals depend on. To protect the forest, do not dump your worms in a forest or woodland. Find a gardener who will welcome them as an addition to their compost bin — or start a compost bin of your own.
Lesson 5: Ecosystems & Matter Cycle
Pond Ecosystem Game
Action Cards printout | Print 8 copies |
Big Fish Ecosystem Cards printout | Print 15 copies |
Check the Pond printout | Print 30 copies |
Fish-O-Meter printout | Print 30 copies |
Pick-a-Card/Discard Pile/How to Play printout | Print 8 copies |
Scissors
|
30 pairs |
In Part 1 of this activity, students will work in pairs. In Part 2 of this activity, students will work in groups of four to play the Big Fish game. Homeschool students can work on their own for Part 1, but will need a few friends in order to play the game.
Plan Your Time
Part 1 (building an ecosystem) takes 10 to 15 minutes. Part 2 (playing the game) takes at least 20 minutes.
You may want to divide this lesson into two sessions, stopping after Part 1 and continuing with the game at a later point. If you plan to do the activity in two sessions, the group game begins at Step 12.
Sort Materials for Part 1 and Part 2
Divide your materials into two piles.
For Part 1, you’ll need:
- Half of the Fish-O-Meter printouts
- Big Fish Ecosystem Cards
- scissors
- binder clips (optional)
For Part 2, you’ll need:
- the rest of your Fish-O-Meters (so each student has one)
- Check the Pond
- Pick-a-Card/Discard Pile/How to Play
- Action Cards
- scissors
Planning for Two Sessions
If you want to do Part 1 and Part 2 on different days, you can keep materials organized by having each pair of students clip their cards, their Fish-O-Meter, their pointer, and their worksheets together with a binder clip at the end of Part 1.
When you are doing Part 2, start by giving each pair of students their materials from Part 1. Then have pairs get together to make groups of four and distribute the additional worksheets.
Lesson 6: Protecting Environments
Bloom Busters
Bloom Busters Rules printout | Print 10 copies |
Consequences printout | Print 10 copies |
Map of Laketown printout | Print 10 copies |
Prevent It! Projects printout | Print 10 copies |
Progress Cards & Deck Mat printout
Needs to be prepped prior to lesson. |
Print 10 copies |
Scissors
|
30 pairs |
1 Cup (8 oz) Container
Any cup, bowl, or small container will work.
|
Details
10 cups
|
Paper Clips
|
10 paper clips |
Bingo Chips
You can use any color, but we prefer green to represent the green algae.
Any type of counters can be used.
|
Details
600 chips
|
Dice, 6-sided
|
10 |
We suggest students play the game in groups of three.
Prepare Cups with Bingo Chips
Place 60 bingo chips into each cup. Each team of 3 students needs a cup with bingo chips.
Prepare Decks of Cards
Print out the four pages of Progress Cards and cut along all the dotted lines. If you have a paper cutter, this will make this task easy. Each group of three students needs a deck of cards, so you can place each deck into an envelope or secure together with a binder clip for easy distribution.
Organize Group Materials
Once all the cards are prepared, each group of three students will need a Map of Laketown (2 pages), Prevent It projects (2 pages), Consequences, Bloom Busters Rules, the Deck Mat, and the deck of Progress Cards (52 cards total).
Laminate (Optional)
Once all paper game pieces are cut out and prepared, you can optionally laminate them for future use!
Teacher Background
This lesson focuses on green algal blooms, but algae come in a variety of colors. So depending on where you live, you may be more familiar with different types of harmful algae blooms, such as “red tide”.
Lesson 7: Food Webs & Flow of Energy
Create a Dinosaur Food Web
Dino Die-Off Cards printout | Print 15 copies |
Dinosaur Food Web worksheet | 30 copies |
Dinosaur Food Web Answer Key teacher-only resource | 1 copy |
Markers
Pens, crayons, or colored pencils will also work.
|
Details
30 markers
|
Scissors
|
30 pairs |
Black Construction Paper
|
8 sheets |
Colored Construction Paper
|
15 sheets |
We suggest students work in pairs. Homeschool students can work on their own.
Each pair of students needs an area that’s about 2 feet by 3 feet for their completed food web. Plan for enough space. Students can work at desks, tables, or on the floor.
Access to a paper cutter will make your activity prep really easy.
Prepare Connector Strips
If you have access to a paper cutter, we suggest you use one to prepare these construction paper strips.
Cut the black construction paper into strips measuring 3” by ¾”.
Cut your colored construction paper into strips measuring about 4” by ¾”.